Welsh cakes (picau ar y maen in Welsh) are a type of scone, flavoured with dried fruit and mixed spice, rolled out a little more thinly than regular scones and cooked on both sides on a traditional bakestone or a hotplate or just in a frying pan instead of being baked in the oven. When they are done they should be a reddish-brown on both sides and cooked all the way through. You sprinkle them with a little sugar while they are still warm, and it sticks to the surface in a shimmery layer.
The 'correct way' to make Welsh cakes is fiercely contested, with many families swearing by their Grandmother's particular method, adding candied peel, using baking powder and extra bicarbonate of soda, with or without eggs. See here for a highly amusing challenge to the authenticity of the wife of last year's US presidential candiate Ann Romney's Welsh cakes.
In the UK, Welsh cakes are often made with half of the fat being butter and half being lard, and they are traditionally cooked using a little lard to grease the plate. Since lard isn’t all that easy to come by in Tokyo, this recipe is for all-butter Welsh cakes. If you have access to lard you might want to try it as it will give a lighter, flakier result.
Welsh cakes. Adapted from the original Delia Smith recipe here for those of us without self-raising flour.
Ingredients
- 220g plain all-purpose flour
- 2 level-teaspoons of baking powder
- 1/2 teaspoon of salt
- 1 level-teaspoon mixed spice
- 75g caster sugar
- 110g butter
- 110g raisins (or mix of raisins, currants, candied peel)
- 1 egg
- a little milk
- extra butter for cooking
Method
- Sieve the flour, baking powder, salt and mixed spice together in a large bowl. Distribute the baking powder evenly through the flour by giving it a quick stir with a metal whisk or a fork.
- Add the butter in small cubes and rub it into the flour until it resembles breadcrumbs - a few bigger bits of butter here and there are fine.
- Stir in the caster sugar and the dried fruit.
- Beat the egg lightly and cut it into the mixture with a round-bladed knife.
- If the dough doesn't start to come together after cutting and mixing with the knife, add a small splash of milk or two and mix until it does. The dough shouldn't be too wet or sticky.
- Turn out of the bowl and knead very briefly until it has come together.
- Press the dough ball slightly flat on a lightly floured surface and roll out until it's between 1/2 - 1cm thick. They puff up slightly when they cook.
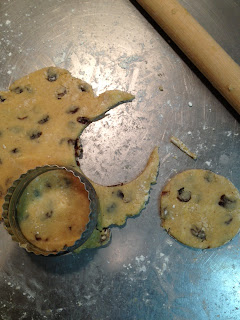
- Use an upturned glass or round cookie cutter about 6cm wide to cut out discs of dough.
- Add a little butter to your pan and heat to medium-hot.
- Transfer the cakes to the pan and cook until browned but not burned on the under-side. Use a spatula to gently lift an edge of one after a minute or so to check they aren't browning too quickly.
- When they are ready to turn over the tops will still be doughy but the base will be firm enough to give you purchase to slide under and flip them over. Use a knife and a spatula to make it easier to maneuver.
- They should take 2-3 minutes on each side and you can then transfer them to a rack to cool and sprinkle over a little extra sugar on each side as they do so.
Perhaps because there is a higher surface-to-crumb ratio (imagine, it’s like having two bases of a regular scone, in one scone!), or because cooking in direct contact with the griddle creates a more emphatic maillard reaction, or it could be the use of mixed spice and the sugary coating... but these are delicious. Pretty, easy to make, and not fiddly at all to eat (at hanami!) just as they are, or with a little butter and/or jam. Yep, I think you might just have to make some too.
And of course this is another awesome Tokyo apartment-friendly recipe, like steamed sticky toffee pudding, not requiring an oven at all! Get in!
They keep for a couple of days in an airtight container, but since they are a baking powder-leavened quick-bread you’ll have best results if you wrap them in plastic and freeze them if you make more than will be consumed in one sitting.


No comments:
Post a Comment